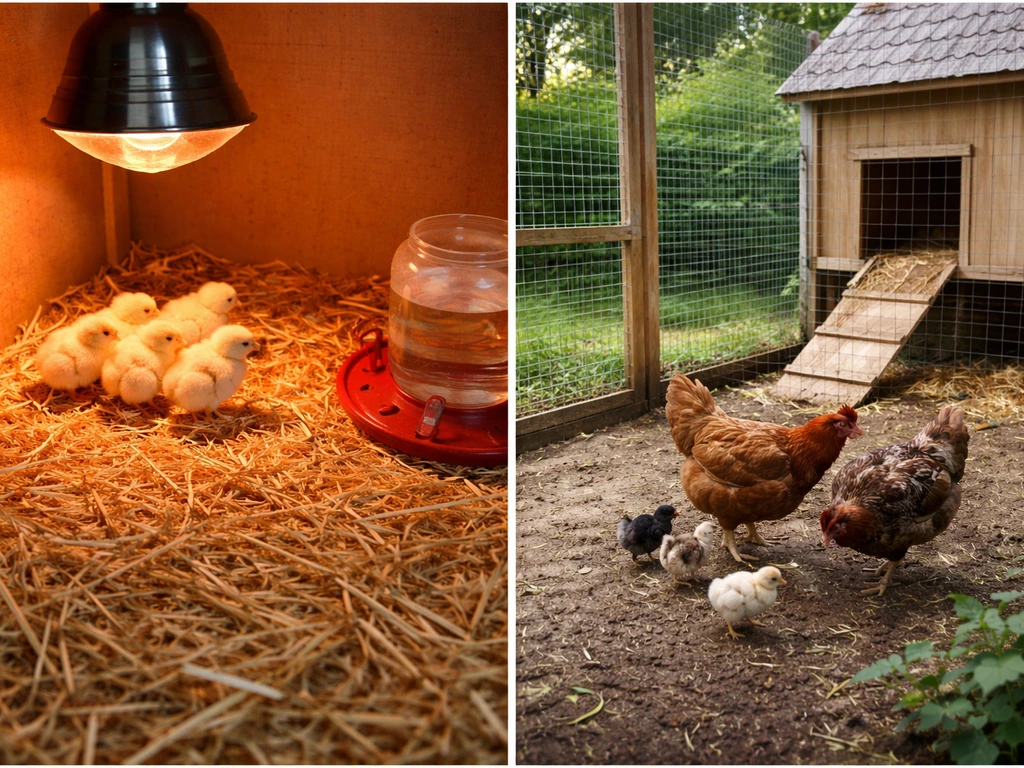
Yes, you can raise hens and chicks indoors, but it comes with real constraints that most people underestimate. Baby chicks absolutely need to start in a warm, controlled indoor brooder for their first few weeks of life. Adult hens, on the other hand, are best kept outdoors once they're feathered out. The practical answer is: indoors works great for brooding young chicks, but it's a temporary arrangement, not a long-term living situation for full-grown birds.
Can Hens and Chicks Grow Inside? Indoor vs Outdoor Guide

James Hartwell
12 May 2026
What 'Inside' and 'Outside' Actually Mean for Chickens
When people ask whether hens and chicks can grow inside, they usually mean one of two things: can baby chicks be raised indoors during their first weeks of life, or can adult hens live inside a house long-term? These are very different questions with very different answers. Baby chicks need warmth, protection, and close monitoring that an indoor brooder provides perfectly. Adult hens need fresh air, space to move, outdoor light cycles, and room to exhibit natural behaviors that a house simply cannot offer at any reasonable scale.
Think of it like starting seedlings indoors before transplanting them to the garden. Indoor brooding is a controlled starting environment, not a permanent home. The transition from inside to outside is a normal, expected part of raising chickens, not a sign that something went wrong. Understanding this from day one saves a lot of frustration later.
Is Raising Chicks Indoors Actually Feasible? The Honest Checklist
Indoor brooding is genuinely doable for most people with a garage, spare room, basement, or even a large closet. That said, a few challenges consistently trip people up, and it's worth being honest about them before you bring any birds inside.
- Smell: Chick litter and manure produce ammonia quickly, especially in poorly ventilated spaces. This is the number one reason indoor brooding goes badly. If you can smell ammonia when you walk in, it's already at a level that damages chick respiratory systems.
- Dust: Chicks generate an astonishing amount of fine feather dust and dander within their first two weeks. It coats surfaces, gets into HVAC systems, and irritates human lungs. Not a health crisis, but definitely unpleasant and worth anticipating.
- Noise: Chicks peep constantly, especially when cold or stressed. A room next to a bedroom is not a good brooder location.
- Fire risk: Heat lamps are the leading cause of poultry-related structure fires. A spring clamp alone is not enough to secure a heat lamp, and a lamp that falls onto dry bedding can ignite within seconds.
- Space: Each chick needs at least half a square foot of brooder floor space from day one through six weeks. Ten chicks need at least 5 square feet of floor space, and that's the minimum, not the ideal.
- Humidity and wet litter: Waterers tip, chicks splash, and litter gets wet fast. Wet litter breeds bacteria and causes respiratory problems and foot issues.
If you can manage ventilation, keep the bedding dry, and secure your heat source safely, indoor brooding is very achievable. If any of those three feel shaky, fix them before the chicks arrive, not after.
Setting Up a Safe Indoor Brooder Step by Step
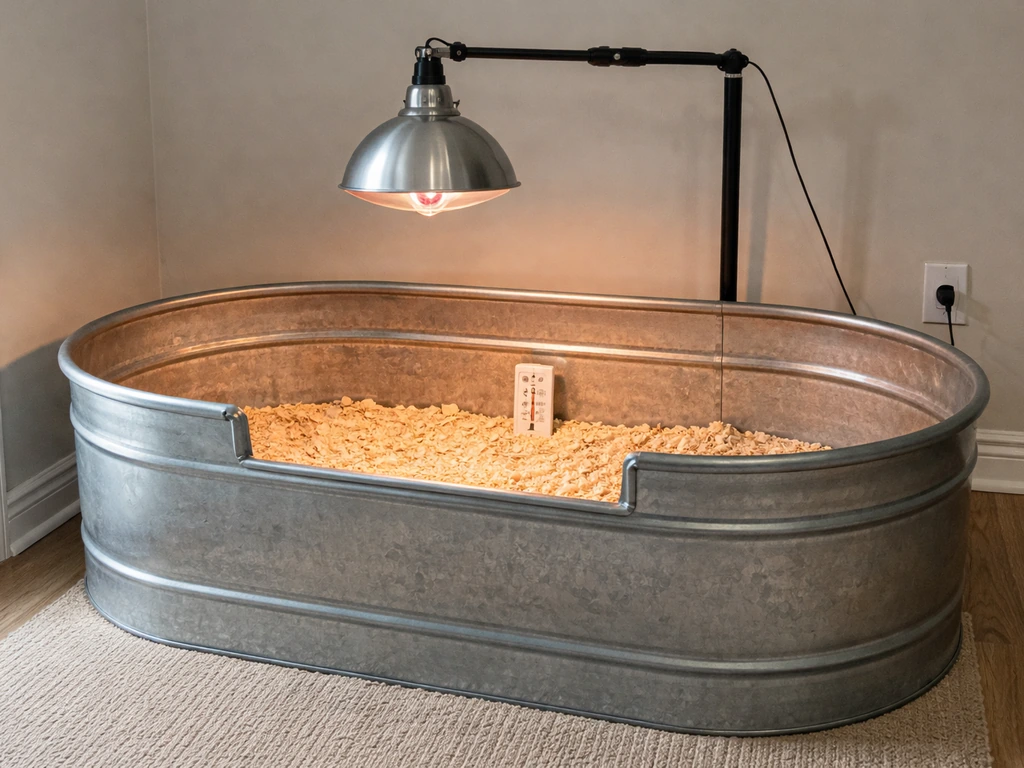
Choosing the Right Container
For small flocks of up to 10 chicks, a large galvanized stock tank, a plastic storage tote, or a solid-sided cardboard box works well. UNH Extension recommends a container at least 30 inches deep and providing roughly 1 square foot of floor space per bird. Depth matters because chicks will try to hop out as soon as they can, usually by week two or three.
Temperature: The Most Critical Variable
Start the brooder at 90 to 95°F for the first week, measured at chick height (about 12 inches from the hottest spot, directly under the lamp). Drop the temperature by 5°F each week after that. By week five, chicks are comfortable at around 70 to 75°F, which is close to normal room temperature. Use a thermometer rather than guessing, but also watch the chicks: if they huddle tightly under the lamp, they're cold. If they scatter to the edges and pant, they're too hot. Chicks spread out evenly and move around freely when the temperature is right.
| Week of Age | Target Brooder Temperature |
|---|---|
| Week 1 | 90–95°F |
| Week 2 | 85–90°F |
| Week 3 | 80–85°F |
| Week 4 | 75–80°F |
| Week 5 | 70–75°F |
Heat Lamp Safety
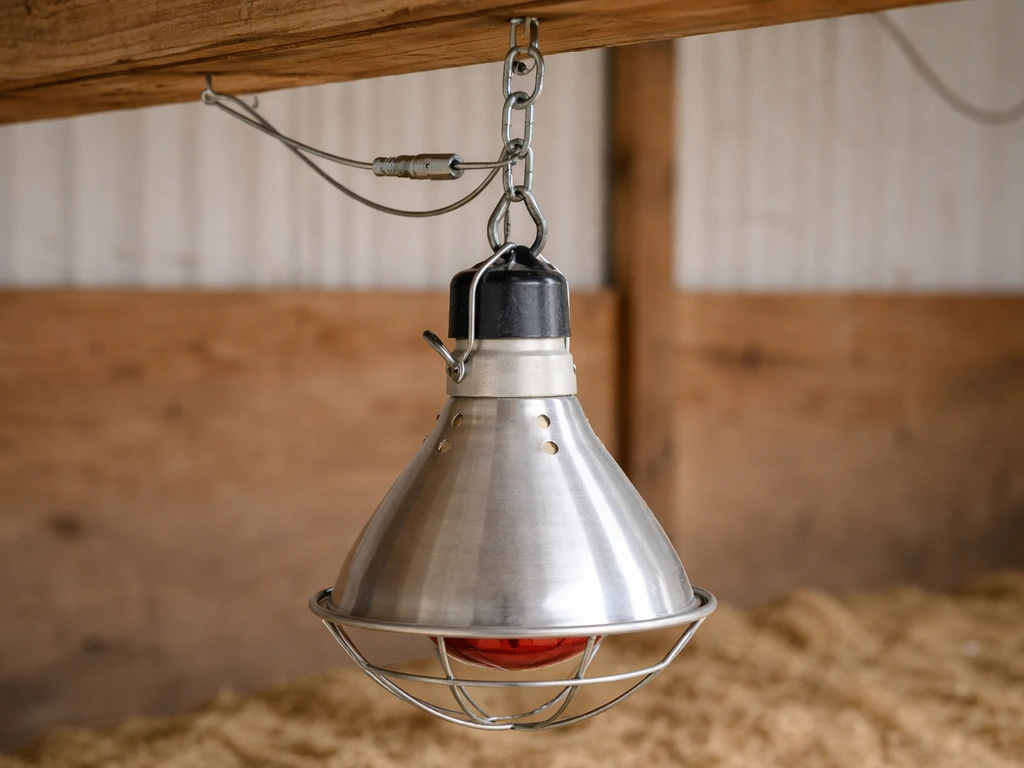
Hang the heat lamp from above using a chain or wire, not just the clamp that comes with it. Clark County fire safety guidance is clear: a spring clamp alone is not adequate and lamps can dislodge easily. Run a secondary safety wire through the lamp's handle so that even if the clamp fails, the lamp can't fall. Keep dry bedding at least 18 inches below the lamp at all times. Never leave a heat lamp unattended in an enclosed space you don't check regularly.
Brooder Guard and Space
If you're brooding in a larger space rather than a container, use a circular brooder guard made of cardboard or wire mesh that's 18 to 24 inches tall. The circular shape is intentional: corners allow chicks to pile up and suffocate each other when they get startled. The ring keeps chicks near the heat source while they're still learning to regulate their own body temperature. As chicks grow, expand the ring gradually.
Lighting
For the first 48 to 72 hours, keep the brooder lit 24 hours a day. This helps chicks find their food and water, which is critical in the first couple of days when they're still learning. After that, a normal light/dark cycle is fine. For general brooder lighting, one 25-watt incandescent bulb covers about 40 square feet of space adequately.
Ventilation
The space needs fresh air exchange without drafts blowing directly on the chicks. A window cracked open in the room, a small fan circulating air at a high point, or a mesh-topped brooder all help. The goal is removing ammonia and moisture without chilling the birds. If you can smell the brooder from the doorway of the room, ventilation is insufficient.
Feeding, Water, Bedding, and Daily Cleaning
Feed
Introduce feed no later than the end of the second day, and only after chicks have learned to drink. This sequence matters: hydration before food prevents early digestive problems. Use a chick starter mash for the first 6 to 8 weeks. Medicated starter containing a low-level coccidiostat is recommended during brooding and the growing period to prevent coccidiosis, which is one of the most common killers of young chicks.
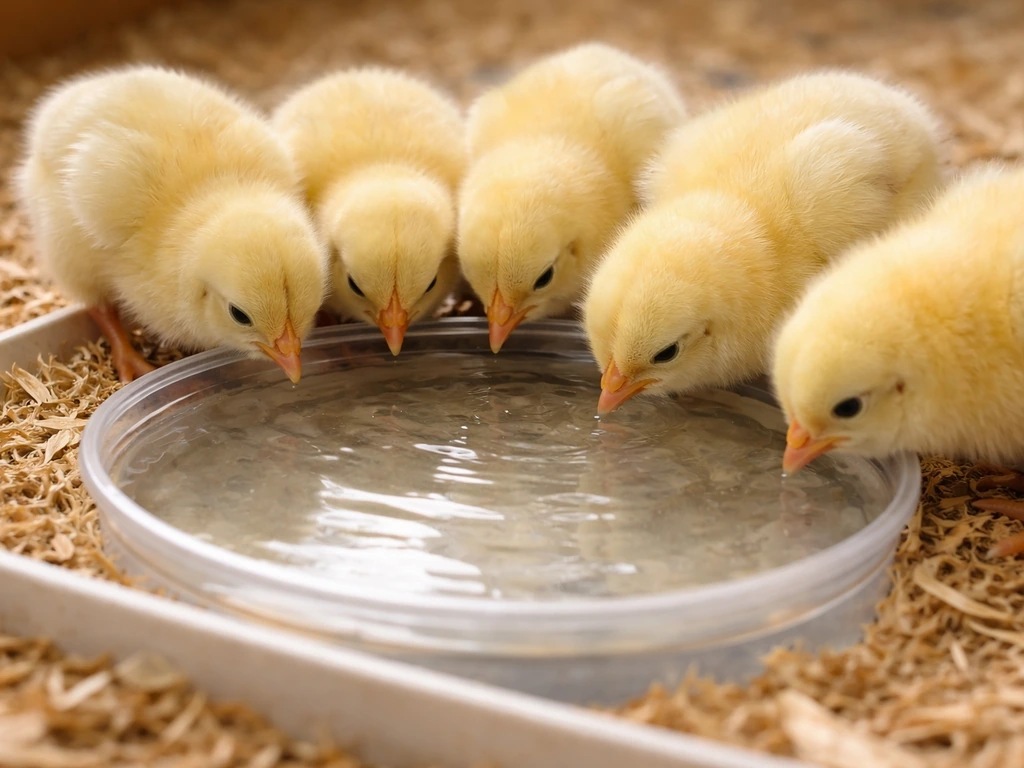
Water
Chicks need constant access to fresh, clean water. Place waterers on a small platform or tray to reduce the amount of bedding and litter that gets kicked into them. Wet litter under and around waterers is inevitable, so check that area specifically every day. A platform that raises the waterer just an inch or two makes a noticeable difference in how quickly litter becomes soaked.
Bedding and Cleaning
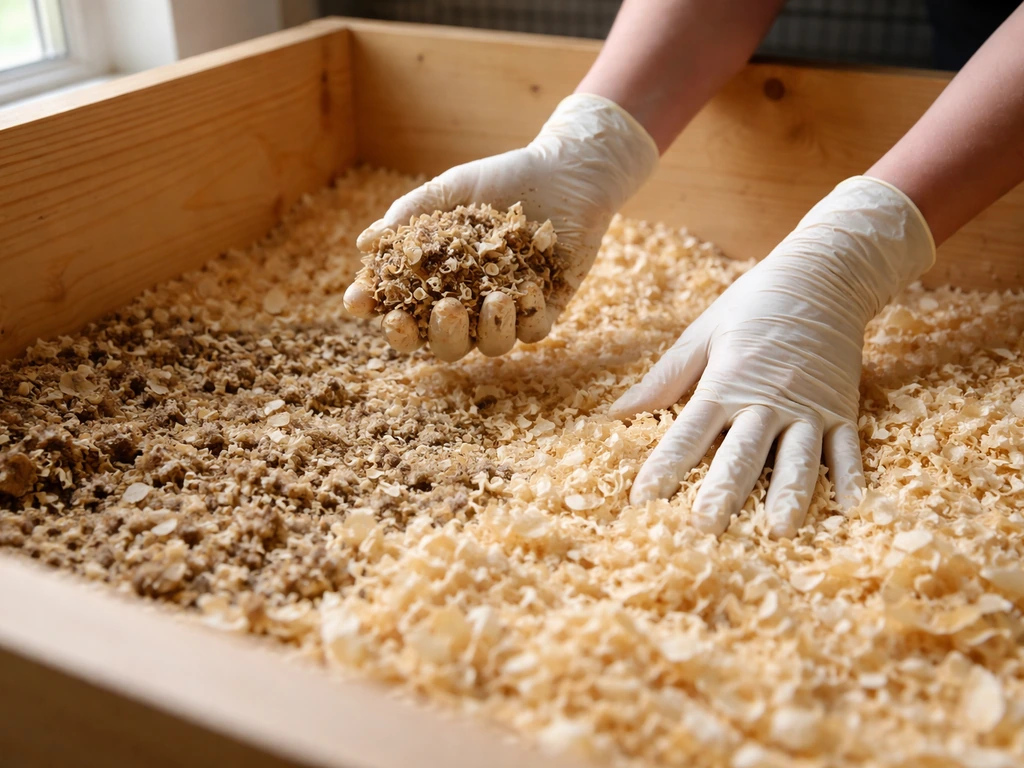
Pine shavings are the most practical bedding choice: absorbent, widely available, and easy to scoop. Start with a 2 to 3 inch layer. Remove wet bedding daily, especially around the waterer. Add fresh shavings on top (called the deep litter method) or do a full cleanout every few days depending on how fast it gets soiled. Wet, ammonia-smelling litter is an immediate health risk, not just a maintenance inconvenience.
Watch for Pasty Butt
Pasty butt (vent pasting) is a common early issue where feces stick and dry over the vent opening, blocking it. Check each chick's vent daily for the first week. If you see buildup, soak the area gently with warm water, remove the crust carefully, then use a hairdryer on the lowest heat setting to dry the vent area. Apply a tiny amount of petroleum jelly or coconut oil afterward to prevent it from happening again. Left untreated, pasty butt is fatal.
What the Outdoor Setup Needs to Look Like
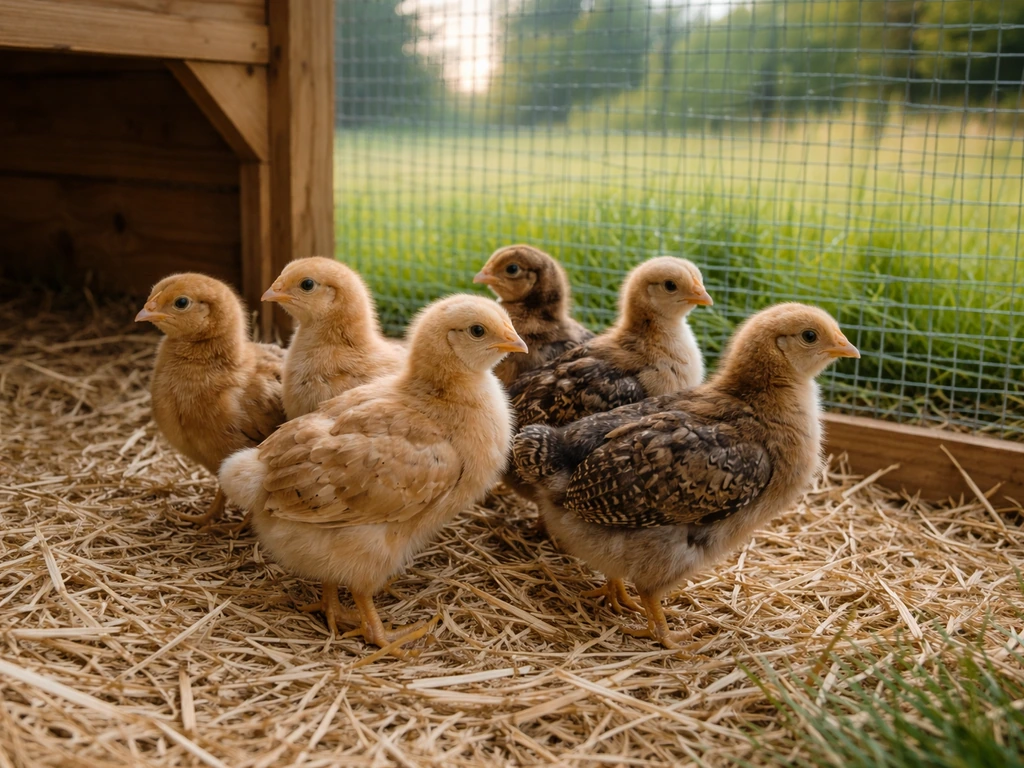
Once chicks are fully feathered (usually around 6 weeks, though this varies by breed and ambient temperature), they're ready for outdoor life. Adult hens thrive outdoors and, frankly, do much better there than inside. Here's what a proper outdoor setup requires.
- Space: Allow at least 3 to 5 square feet of indoor coop space per bird, plus access to an outdoor run. Overcrowding causes stress, disease, and pecking injuries.
- Coop structure: Use secure flooring (concrete slab or solid wood) to prevent predators from digging under. Raise the coop at least 1 foot off the ground to reduce access from below and to allow air circulation.
- Run fencing: Enclose the outdoor run with 1-by-2-inch mesh fencing, not standard chicken wire, which predators can tear through. Bury the fencing at least 6 to 12 inches underground or use a hardware cloth apron laid flat on the ground to stop digging predators.
- Ventilation: Build in as much ventilation as possible without creating drafts or gaps that predators could use to enter. Ridge vents, covered windows, and ventilation openings near the roofline all work well.
- Predator deterrence: Design for raccoons, rats, snakes, and skunks specifically. These are the most common threats depending on your region.
- Roosting and nesting: Provide 8 to 10 inches of roosting bar per bird and one nesting box for every 3 to 4 hens.
Moving Chicks from Inside to Outside: Timing and Health Steps
The transition from brooder to outdoor coop is where a lot of beginner chicken keepers lose birds. Rush it and you'll have chicks that chill at night, get picked on by older birds, or develop respiratory problems from the temperature shock. Do it right and it's a non-event.
- Wait until chicks are fully feathered, which is typically around 6 weeks of age. Earlier is possible in warm climates if outdoor nighttime temperatures stay above 65°F, but full feathering is the more reliable marker than age alone.
- Harden them off first. A week before the full move, let chicks spend increasingly longer periods outside during warm parts of the day. Start with an hour and work up to a full day outdoors before they spend their first night outside.
- Check the outdoor temperature at night. Chicks that are fully feathered and in a group can handle overnight temperatures down to about 65°F without supplemental heat. If nights are colder than that, delay the transition or provide a low-wattage heat source in one corner of the coop until temperatures warm up.
- Introduce chicks to adult hens carefully if you're merging flocks. Keep them in separate but adjacent spaces so they can see each other without direct contact for one to two weeks. This reduces the severity of pecking order disputes.
- Do a health check before moving. Look at each bird for signs of respiratory illness (rattling breathing, nasal discharge, watery eyes), pasty vents, lethargy, or abnormal droppings. Don't move sick birds to the outdoor flock.
- Clean and disinfect the brooder after the chicks move out to prevent pathogen buildup for future use.
Warning Signs to Stop and Reassess Immediately
- Chicks huddling tightly and peeping loudly after being moved outside: they're cold. Bring them back inside or add heat.
- Any ammonia smell in the coop or brooder: increase ventilation and clean bedding right away.
- Multiple chicks with pasty vent, lethargy, or labored breathing: this warrants a vet call, not a wait-and-see approach.
- Signs of predator attempts on the outdoor coop (dug soil, damaged fencing, feathers outside the run): reinforce immediately before another night passes.
- Chicks not eating or drinking after the first 48 hours in the brooder: check temperature, check that feeders and waterers are accessible, and look for pasty butt.
Raising chickens, whether you start indoors or skip straight to a backyard setup, is genuinely rewarding and not technically difficult once you understand what they actually need. If you meant holly plants instead of chicks, you can also grow holly indoors with the right light and humidity conditions. The indoor phase is short, manageable, and sets your birds up for a healthy outdoor life.
If you want a houseplant instead, you may be wondering can bird of paradise grow indoors, and the answer depends mostly on light and humidity. Get the brooder temperature right, keep the bedding dry, secure your heat lamp properly, and watch your chicks' behavior daily. If you are also thinking about growing plants indoors, you can apply similar indoor-environment thinking to honeysuckle, but it has different light and training needs than chicks grow honeysuckle indoors.
Those four habits alone will carry you through the hardest part of the whole process.
FAQ
Can hens and chicks grow inside a house with no outdoor access at all?
Chicks can be raised indoors temporarily with a brooder, but full-time indoor housing for adult hens is risky. Without outdoor light cycles and enough space for normal movement, hens are more likely to develop stress behaviors and respiratory issues from stale, ammonia-prone air. If you must keep them indoors, you need a large, well-ventilated enclosure, daily air exchange, and a plan to move them outdoors as soon as they are feathered.
What is the minimum age or condition for moving chicks outside?
A good target is full feathering, around 6 weeks for many breeds, but ambient temperature matters. If nights are still cool, use a gradual transition, bringing them out during the day first, then increasing outdoor time. If they huddle tightly, look fluffed and inactive, or chirp as if chilled, delay the transition and extend brooder warmth.
Can I skip the light/dark cycle and keep the brooder fully lit for longer than 72 hours?
It is best not to extend constant light beyond the early learning window. After the first few days, switching to a normal light/dark pattern supports healthier behavior and rest. If chicks seem overly restless or constantly pant, check temperature and ventilation rather than just adding more light.
Do I need a thermometer if I can judge heat by how the chicks act?
You still want a thermometer at chick height, because behavior can mislead you when bedding, drafts, or lamp height are off. For example, chicks can crowd under heat for reasons other than cold, such as stress from handling or uneven heat. Use temperature readings to confirm what the behavior is telling you.
How can I tell if the brooder temperature is uneven?
Even warmth is essential, chicks should spread out in a band, not only cluster in one corner. Uneven temperatures show up when chicks spend most time directly under the hottest spot or pile away from the lamp. Rotate the lamp or adjust height if you notice persistent crowding on one side, and re-check temperature at multiple points.
Is pine shavings always safe, and how deep should I start?
Pine shavings are generally practical, but avoid any bedding that is dusty, scented, or treated with chemicals. Start with about 2 to 3 inches and remove wet bedding promptly around waterers. Too little bedding reduces insulation and increases mess, while overly deep wet litter raises ammonia risk.
Can I use a heat mat instead of a heat lamp for indoor brooding?
Heat mats can work for some setups, but chicks still need the ability to move away from heat, and many mat systems do not provide enough warm coverage at chick level unless they are paired with a brooder guard. If using a mat, confirm temperatures across the whole area and ensure drafts are not chilling chicks at the edges.
What bedding problem is most likely to harm chicks indoors?
Wet, ammonia-smelling litter is the major red flag. It can irritate airways and contribute to illness quickly. If you can smell strong odors from the room entrance, you likely need improved ventilation and more frequent bedding removal around the waterer and under traffic paths.
How do I prevent pasty butt if it keeps coming back?
Recurrent cases often point to dehydration, overly cool spots, or bedding that is too damp near the vent. Verify water access, keep bedding dry around the brooder center, and confirm that the warm zone is not accidentally too cold at chick height. After treatment, continue daily vent checks for several days and avoid handling longer than necessary.
Do chicks need to be medicated indoors, even if my coop area is clean?
Medicated starter can reduce coccidiosis risk during the brooding and growing period, regardless of how clean the space looks. Coccidia can still be present, and young chicks are vulnerable. If you choose not to use medication, be prepared to increase sanitation, manage moisture aggressively, and monitor closely for weakness or diarrhea.
Why do chicks sometimes pile up at corners in an indoor brooder?
Corner piling is a space-design issue. Without a guard, chicks startle and retreat into corners where they can smother or overheat. Using a ring-shaped brooder guard prevents corners, keeps chicks closer to the warm zone, and makes it easier to expand space as they grow.
How do I handle ventilation when keeping birds indoors during cold weather?
Aim for fresh air exchange without direct drafts. Crack a window or use controlled circulation high in the room, but keep the chick area protected so air movement does not chill them. If the brooder smells from outside the room or bedding stays damp, ventilation is not keeping up, and you should adjust immediately.
Can adult hens ever be kept indoors long-term if the setup is perfect?
Even with good feed and clean bedding, long-term indoor housing is hard to do well because hens need outdoor light and behavior space. Indoor-only setups tend to develop odor and air quality issues unless they have large enclosures and strong ventilation, plus ongoing enrichment. The lowest-risk approach is using indoor time only for brooding, then moving them outdoors.
What should I do if chicks chill at night after I start transitioning outside?
Do not assume it is normal. Bring them back to a warm, draft-free area and extend the transition gradually. In the outdoor environment, also check coop ventilation and bedding dryness, because wet litter and cold drafts worsen night chilling even if daytime temperatures seemed fine.